Jaakko Saari takes us through the process of creating this cave entrance asset using Adobe’s VR tool Medium and finishing off in Zbrush and Substance Painter.
Creating Game Assets with Medium
I heard about Medium for the first time in December 2019 just after Adobe’s acquisition. I was still at Adobe at that time, and a coworker at the office lent me his Oculus VR headset for me to try it out. The first encounter with it left me with an impression that this technology can really transform the 3D creation workflow. It felt completely different from anything out there.
So recently I finally acquired my very own first headset, the Vive Cosmos. With Revive software, the Oculus apps can run with HTC hardware, and the experience at least with Medium was completely seamless. You do not need an Oculus to run Medium.
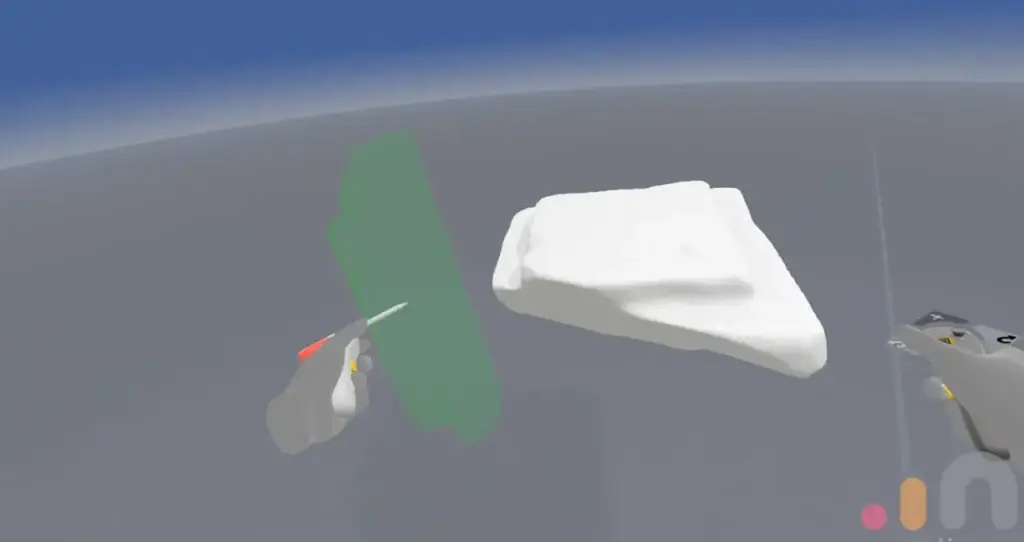
I started playing with some of the stamps from the Clay section that can be accessed with the buttons in the left hand controller. I tried placing a few rocks, and scaling the entire work by using the middle finger grip buttons on both controllers (like Tom Cruise in Minority Report).
I thought I would look to build some kind of structure, so I imported some rocks I had created before in ZBrush from another project. The meshes imported perfectly and I was able to use them as stamps to build the form further. I even created my own stamps in Medium by using the sculpting tools that were very easy to understand. The Flatten brush tool made me smile as that was so intuitive, you have a kind of infinite density flattening iron in your hand that can make anything a flat shape. I was giggling like a five years old, it’s just perfect!
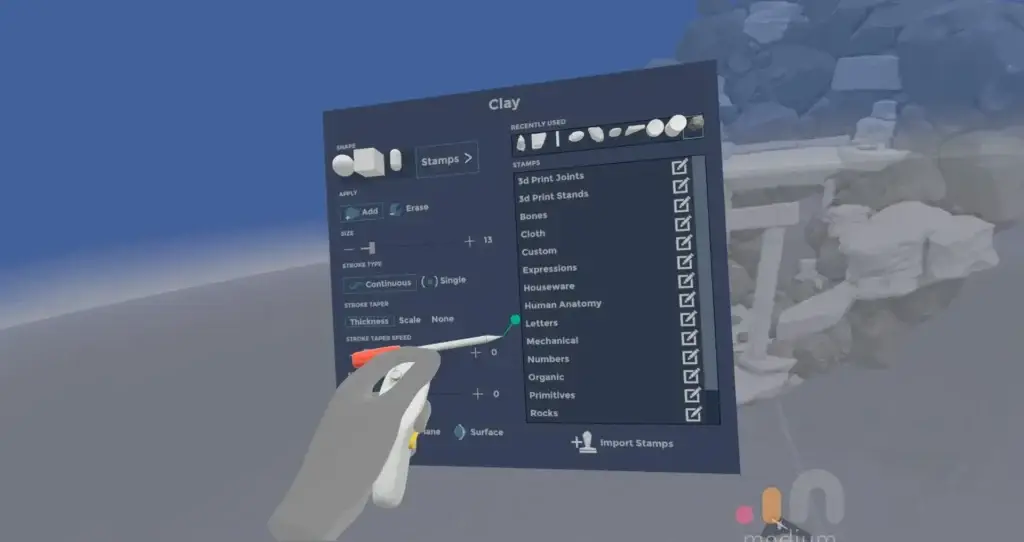
I also was able to paint the rock assets by using the paint brush, and then use them as stamps that already had color in them. Medium really drew me in, I was really surprised how intuitive everything was after I was able to get the basic controls.
Right hand has the controls for File operations and the left has access to brushes, and the grip buttons allow you to scale the assets in the scene. After around thirty minutes of adding rocks, erasing and flattening, I came up with a structure that looked like an entrance to a cave. I was also able to import more detailed rocks from my own asset library and started thinking about the initial color palette.
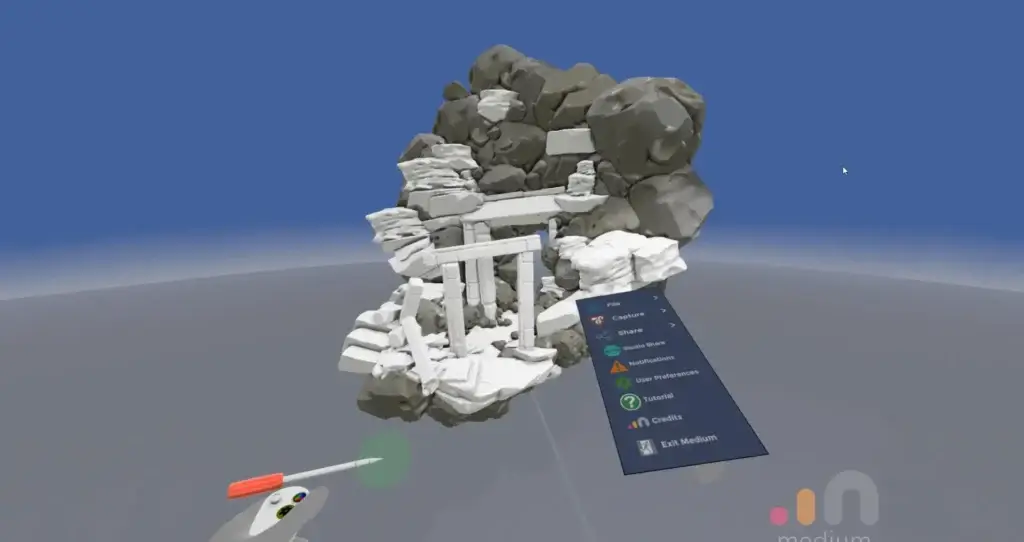
I noticed my routine had somewhat changed by the VR immersion, I felt more inclined to build more natural forms as I would have in an ordinary setup. It is so easy to nail the size of the objects when you are quite literally standing in the middle of the structure. Moving around the scene felt great.
Bringing the Asset into ZBrush
When I was happy with the final look and feel of the structure. I exported the mesh to ZBrush to begin adding further detailing. The voxels in Medium can get your assets to a great place but for this kind of work you really need to get the finer details into the surfaces. When working in ZBrush I always keep an eye on the silhouette thumbnail. It’s small but can be resized, and it really helps to nail the overall shape.
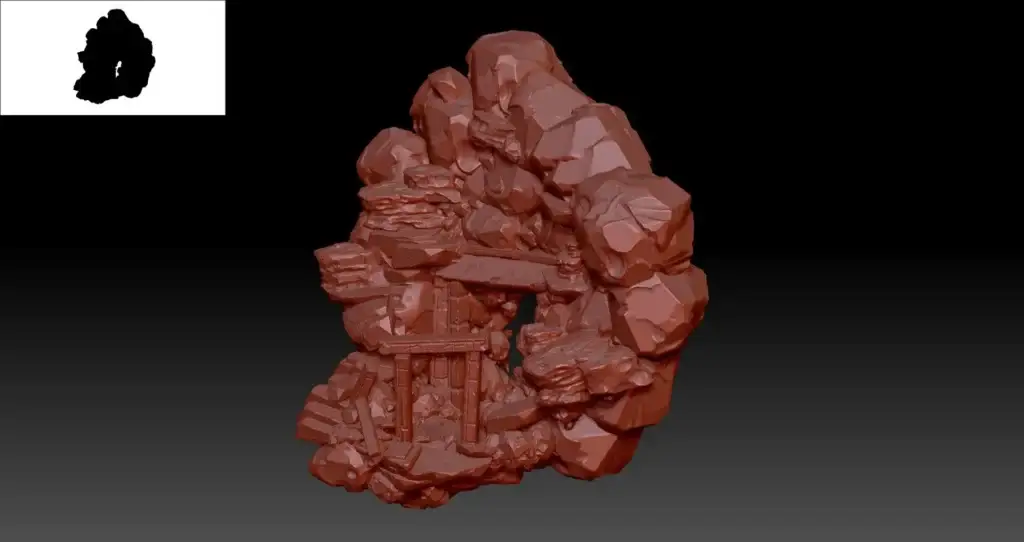
I added some cracks and details using the Orb Cracks brush, and Trim Smooth Borders which creates rock like plateaus and details that look like cracked surfaces. I was able to add necessary detail for the high poly that I knew would make a difference for the final model. I skipped polypainting in this case as I knew I was going to be using Substance Painter for the final materials.
Since this is a static object and never to be deformed, I went on with automatic retopology. I copied the Subtool and used ZRemesher first to get the rough shape in, then used the Decimation Master plugin to reduce the polygons further.
Final Optimisation and UV Mapping in 3ds Max
With the sculpting done, it was time for the low poly and high poly models to be taken from ZBrush into 3ds Max to do some final optimization and UV unwrapping. I deleted some of the polys behind the structure that I know will never be seen and used Flatten Mapping which is 3ds Max way of doing autoUVs. I used UVPackmaster to pack them more tightly.
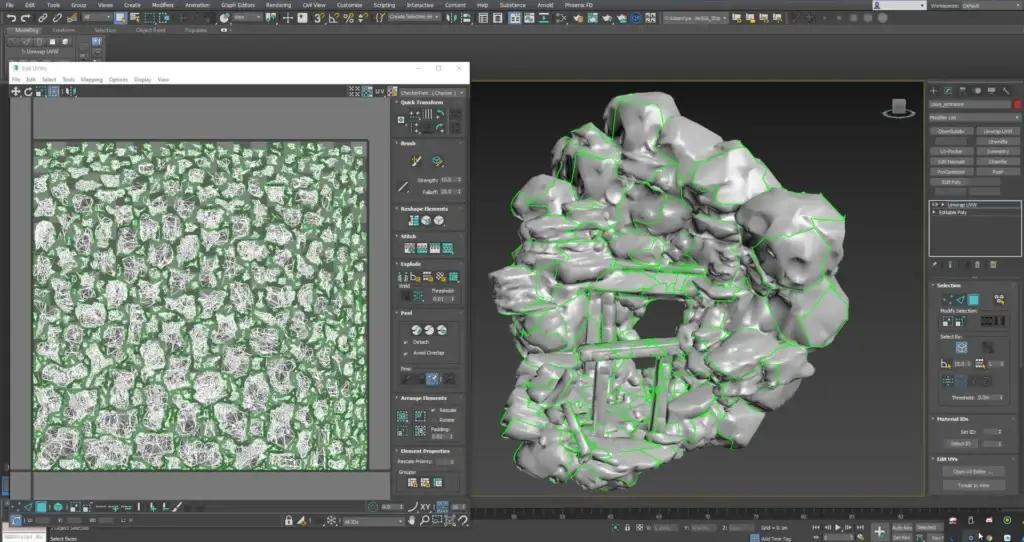
Now, that doesn’t look pretty, but it doesn’t have to be. Substance Painter will handle this just fine.
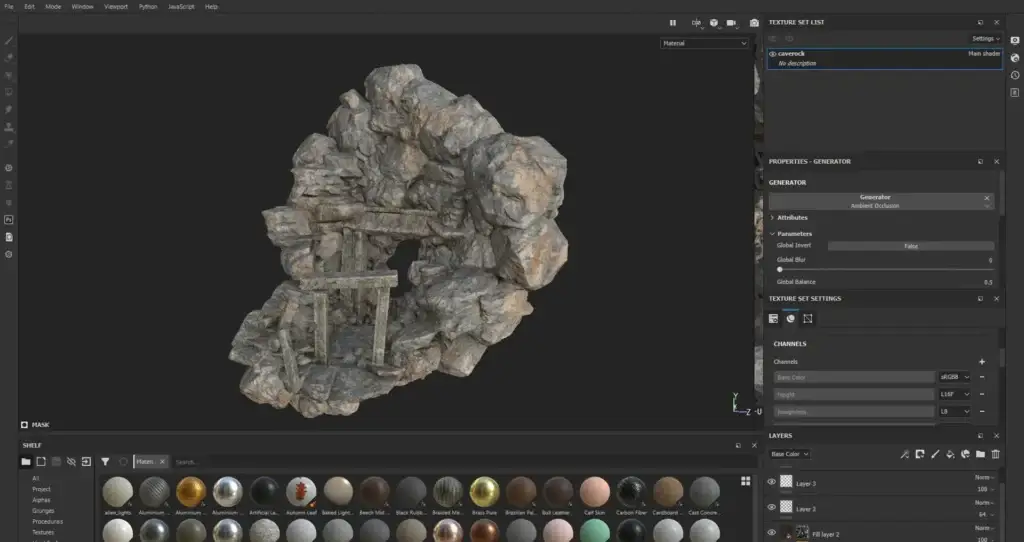
Texturing in Substance Painter
I exported both high and low poly as .fbx and imported them to Substance Painter. This is easily the step I enjoy most. I imported both the high poly and low poly to Substance Painter and baked the Normal Map, AO and Curvature maps to the low poly in 8K. I work in 4K as that is the highest resolution Substance Painter goes up to in the painting viewport at the moment, knowing that I can export higher if needed. The bakes went smoothly from the first try. But sometimes it’s necessary to adjust the projection by using the Max Frontal and Max Rear distance sliders.
I first tried a few fill layers with different colors and ended up going with desert style rocks. I then downloaded Slick Rock Cliff and Rock Dasht Iran from Substance Source and started adjusting them. This is where Substance really shines. You might think that you are locked into the colors and shapes of the preset materials, but actually you have total freedom here. I adjusted the rocks into a more desert style color combination.
Then, I added a darker brown layer with black mask and higher roughness value in which I added an Ambient Occlusion generator and a paint layer. This helped to really add depth to the forms, as occluded areas are more likely to gather dust or dirt. I would like to highlight the importance of going into your model and adding details by hand painting and masking areas out.
Then, perhaps the most important step, I added paint layers on top of everything and added color variation using the dirt brush. You might think that arid rocks just have these sandy desert tones, but here you can really start to add realism. Looking at rock references I picked up dark blue, red and even some desaturated greens and painted them on.
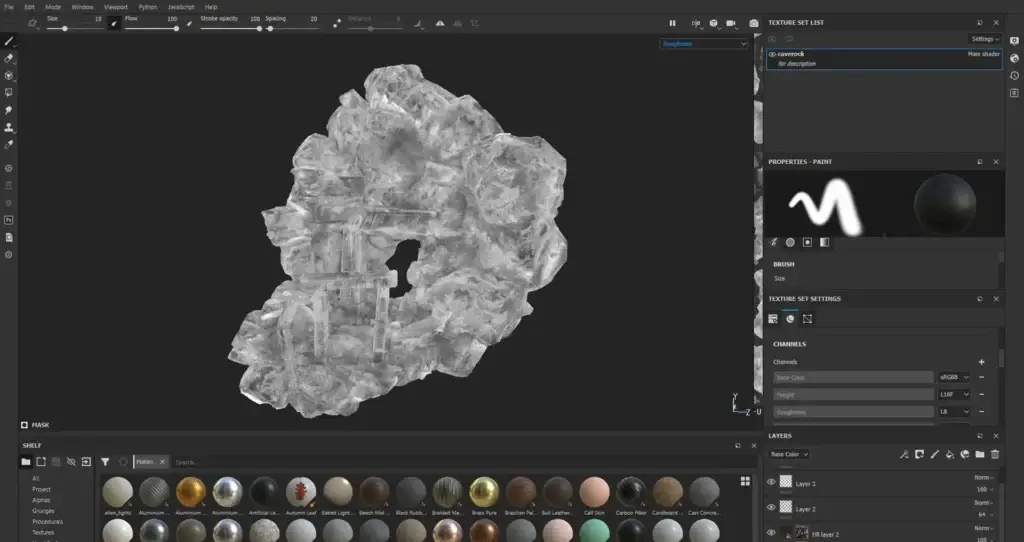
I also like to go through the individual channels in the 3D window such as the roughness that is especially important here. This is to make sure that each of the channels have enough variation for realism.
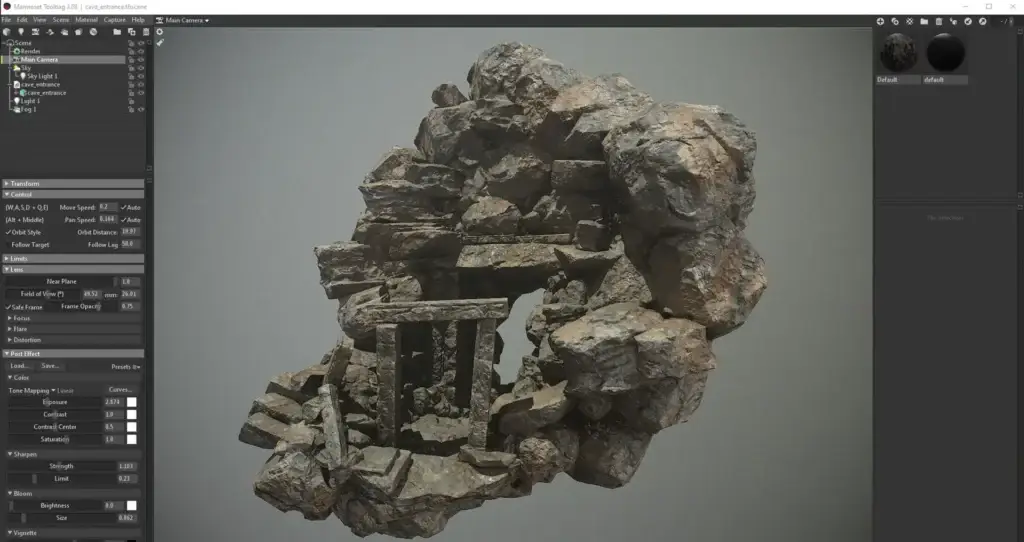
Rendering in Marmoset Toolbag
I exported the maps and made the final renders in Marmoset Toolbag. I like to adjust exposure and contrast in the Tone Mapping section as well as Curves. I also adjust the sharpness and vignette setting to really help make the renders pop.
The final mesh was 46,520 triangles which is about average for AAA assets, with LODS this should be nothing special for an average game engine. I exported the finalized asset into Unreal Engine as well and I was able to check the finalized model in VR which was extremely satisfying.