/

July 4, 2022

How to create a Realistic Tundra Scene in Unreal Engine 5 using QUIXEL BRIDGE

One of the most exciting features of Unreal Engine 5 is the immensely intelligent lighting features. With its latest increment, Unreal Engine has fully integrated the Quixel Bridge plug-in, a free plug-in that allows seamless importation of thousands of assets into the engine.

Today, we’ll look at how to compose a realistic scene in Unreal Engine 5 using Quixel Assets, and set up the skybox to create a jaw-droppingly realistic environment.

  1. To begin, create a new project and a new level. We’ll call this “TundraEnvironment”. and then creating a new level. Call this “L_TundraScene”.
Creating New Project in Unreal Engine 5
Selecting New Project in Unreal Engine 5
  1. Open Bridge. This will either be situated in the top corner of the editor, or under the the “Window” tab. Locate the Tundra collection under Environment, and Natural, and download the following assets in Nanite quality:
    1. Gigantic Tundra Rock Formation
    2. Massive Tundra Rock Formation
    3. Large Tundra Rock Formation
    4. Tundra Rock Formation
    5. Tundra Rocky Ground

*There are a few variations of each of these under the same name; grab a selection of whichever look good to you.

This will take about 10 minutes to download – Nanite assets are extremely highpoly. If your PC is low on storage, opt for a lower quality. When they are complete, add them to your project. They will then appear in the content browser.

Add New Project Window in Unreal Engine 5
  1. Whilst the assets are downloading, go into your Content Folder, and left click. In here, select the Third Person content pack. This is a popular tool used for scale in building environments with Unreal.
Add Third Person Pack to Unreal Engine 5
  1. Begin dragging and dropping your assets into the scene! Begin with the Rocky Ground mesh. Click on asset, and hold ALT and drag to duplicate it. You can repeat this as much as you like until the ground begins to build out, like this:
Adding Rocky Ground Mesh to Unreal Engine 5

Reusing the same asset like this works well to build a quick surface for our tundra effectively. move, rotate and scale each piece by using W, E and R, respectively. The meshes will automatically seam into one another, creating a smooth and realistic looking ground.

Keep playing around with this, using the hotkeys, to avoid repetition; use the scale and rotation tools to create height. Repeat until you have a good amount of ground cover.

HOT TIP: Unreal Engine has snapping switched on by default. You can turn this off for each rotation, scale and here:

Turning Off Grid Snapping in Unreal Engine 5
  1. Now, drag and drop one of your Massive Tundra Rock Formation assets into the scene (the name isn’t an exaggeration, as you’ll see!). Add a few of these, and blend accordingly.

Blending Quixel Assets in UE5

Do this by combining the ground assets with the larger ones; use the rotate and scale tools for this.

How not to blend Quixel Assets in UE5
Correctly Blending Quixel Assets in UE5
  1. Experiment! Try a few different Quixel assets, either the ones we downloaded before, or try some different ones. Alternatively, add your own 3D models. Build your scene out until it resembles a large, spread out area, with good variation.
Blended Rocky Environment Assets in UE5

Adjusting Lighting in UE5

  1. Time for the lighting. Select the DirectionalLight, and either press E or Control + L to rotate this accordingly. Unreal Engine 5 has some an amazing sunlight feature, where the environments’ lighting is updated in realtime.
Dramatic Lighting in Unreal Engine 5

When you’re happy with your lighting, go to SkyAtmosphere in the outliner. Here, go to Rayleigh Scattering under details. This changes the colour of the sky, as well as the light it casts – which means you can get some pretty cool results by playing around with it.

Adjusting SkyAtmosphere in UE5

However, for this scene, we will set it to white; this will create a cloudy, overcast effect. I like this as it is quite cinematic, without being too dramatic.

Overcast Sky in UE5

Secondly, under Atmosphere – Mie, change the scattering scale. This effects the “fuzziness” of the sky, as well as the overall brightness; by making this higher, the sky will be darker and dimmer, casting less light. I set it to 0.5.

Adding Overcast Atmosphere in UE5
  1. Adding background elements. Add some background elements by taking a large asset from Quixel, and scaling it up. Place it in the background and rotate accordingly – and voila.
Adding Quixel Background Elements in UE5

Adding Volumetric Fog in UE5

  1. Now, let’s look look at creating a bit of depth in the scene. At present, the foreground and background don’t have a lot of depth. Begin by going into create, Visual Effects, and then selecting Exponential Height Fog.
Adding Volumetric Fog in UE5

This already makes a huge difference to the scene.

Before and after:

UE5 Environment Before Volumetric Fog
UE5 Environment with Volumetric Fog

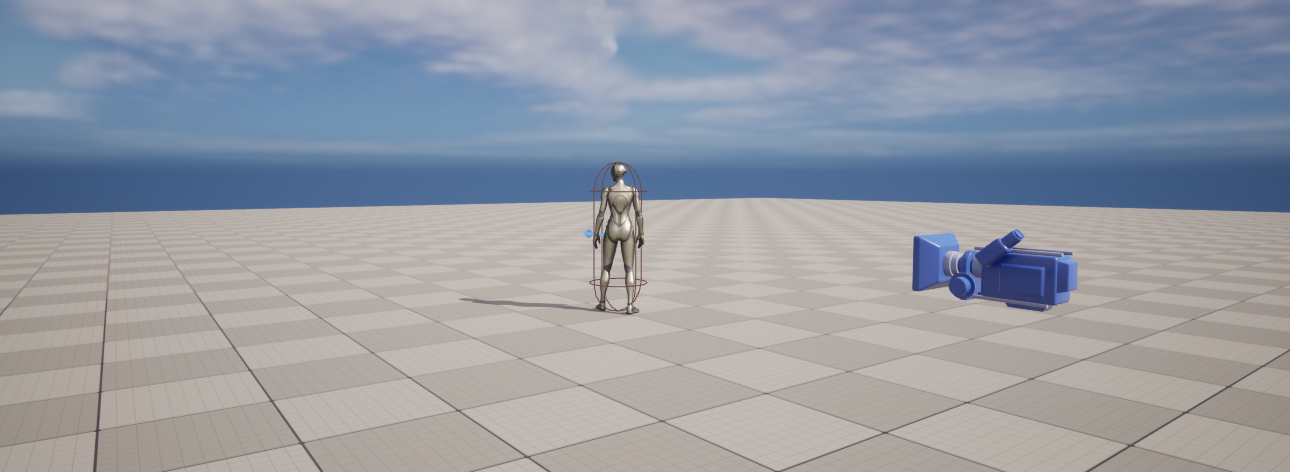
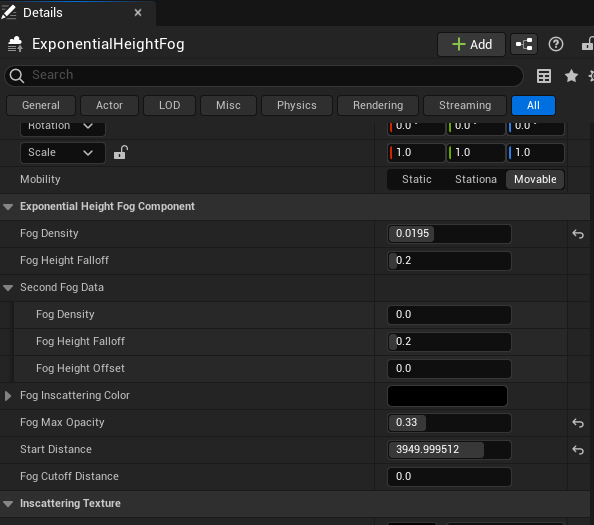
However, we can amp this up a bit. I increased the fog density and set the fog start distance quite high, as I wanted fog purely on the mountains in the background.

Adding Fog Density Settings in Unreal Engine 5

And here’s the result:

Final Result Blending Quixel Assets in UE5

From the same category